After a shoot, the slowest part is often waiting for the client to pick photos: you send a Drive link, get a list of filenames back in a chat, then hunt for each one. In Framie, the client picks on their phone from a single link, and you see what they picked right away.
This guide walks through the whole flow, from creating the album to getting the client's picks back. It takes about five minutes.
Step 1: Create the album
Open the Albums tab and click New album. The dialog has three parts:
- How photos get in: choose Upload photos and Framie stores them for you, or Import from Google Drive to paste a link to a shared folder, and the photos stay on your Drive.
- Client: pick an existing client, or click New client to add one right there.
- Album details: name the album and pick the shoot date. The client sees both when they open the link.
How photos get in can't be changed once the album is created.
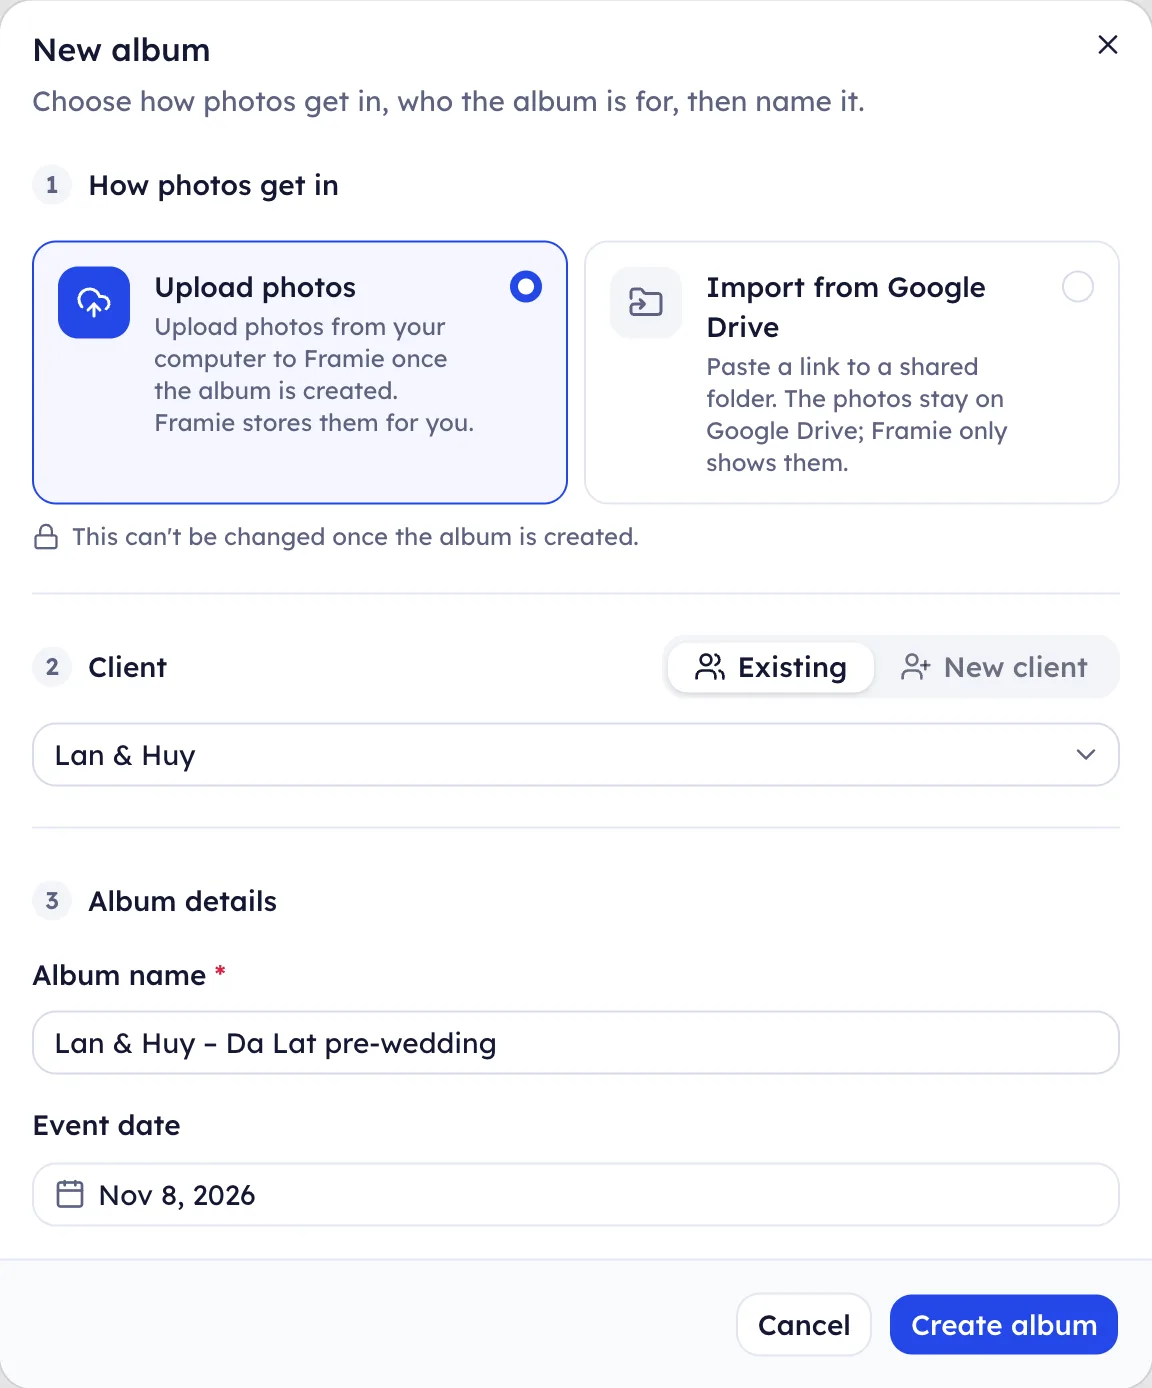
Click Create album to open the album's page.
Step 2: Upload your photos
Click Upload photos at the top right, or drag a whole folder of photos onto the page to upload them to Framie.
The folder button next to it lets you split the photos into folders, such as "Outdoor" and "Studio".
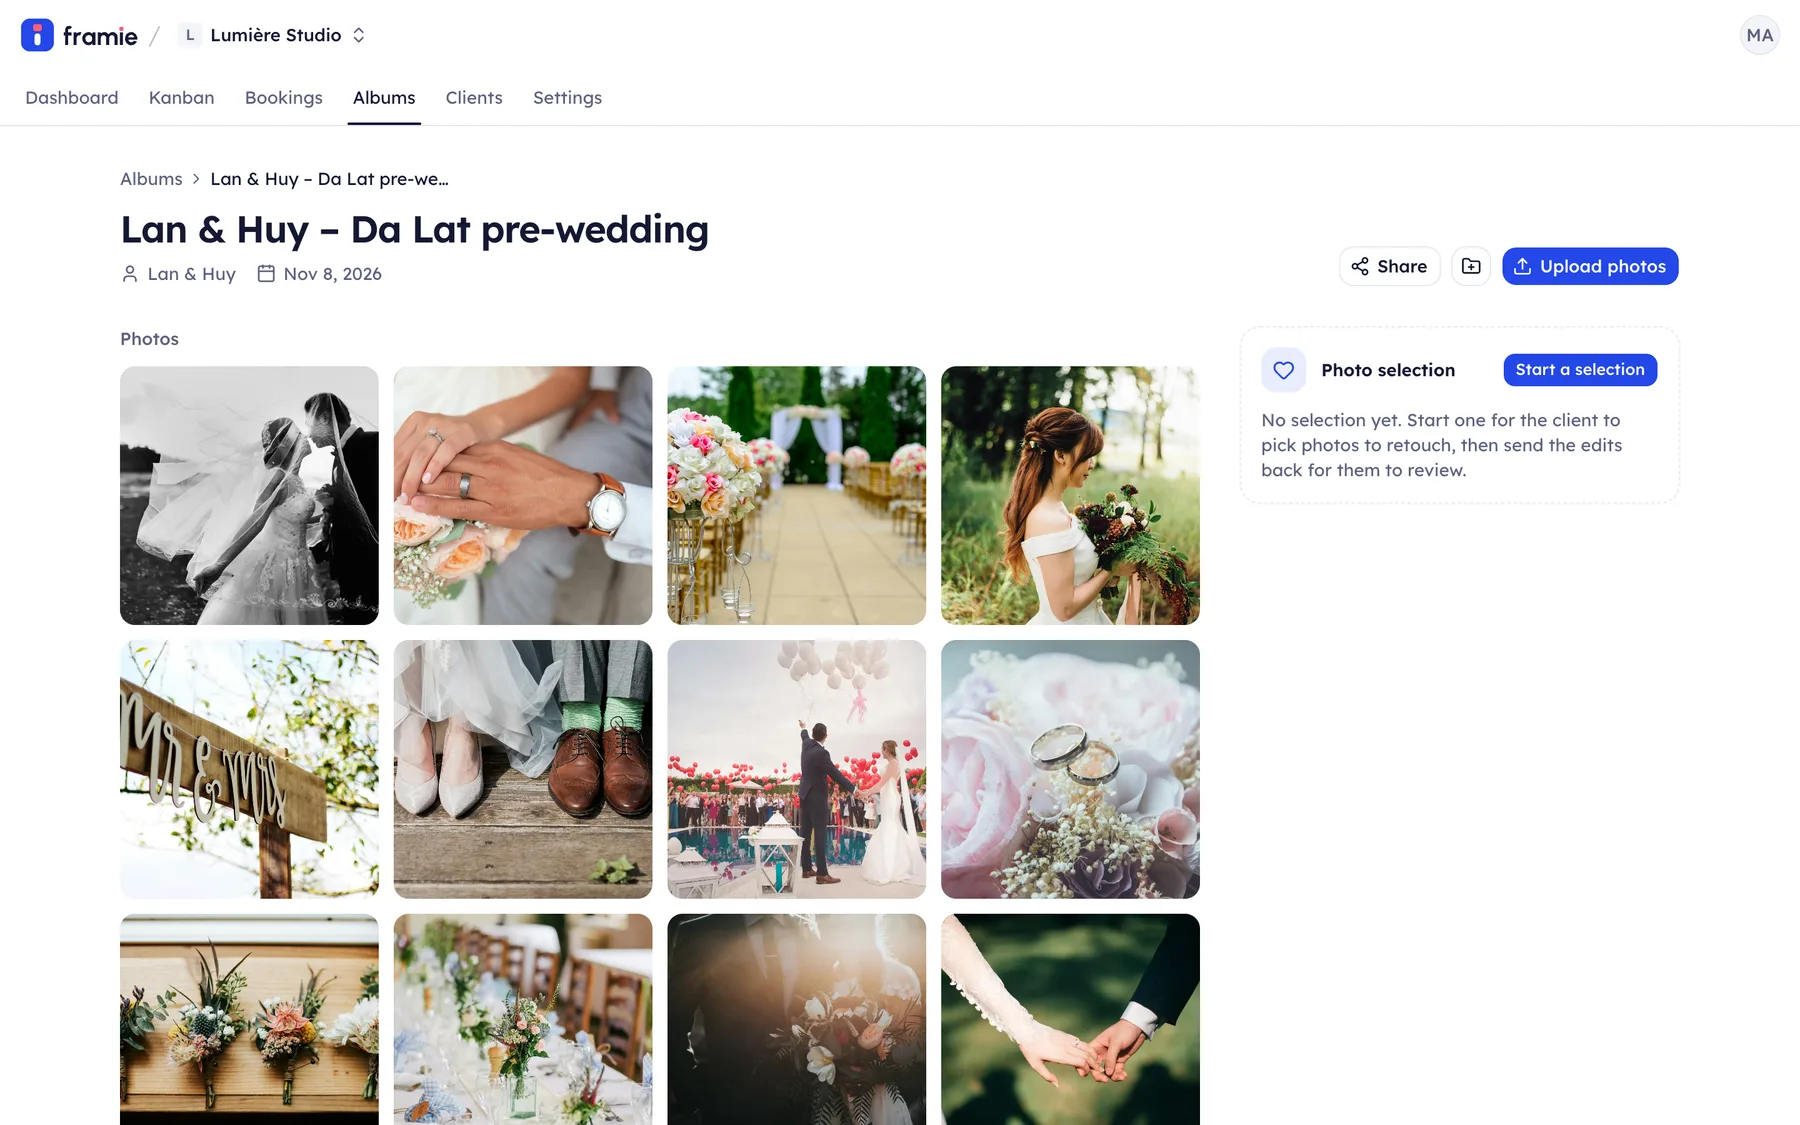
Step 3: Start a selection
On the Photo selection card on the right, click Start a selection and set:
- Folders to pick from: tick the album, or only the folders the client should pick from.
- Most photos: how many photos your package includes, say 10. Leave it empty for no limit.
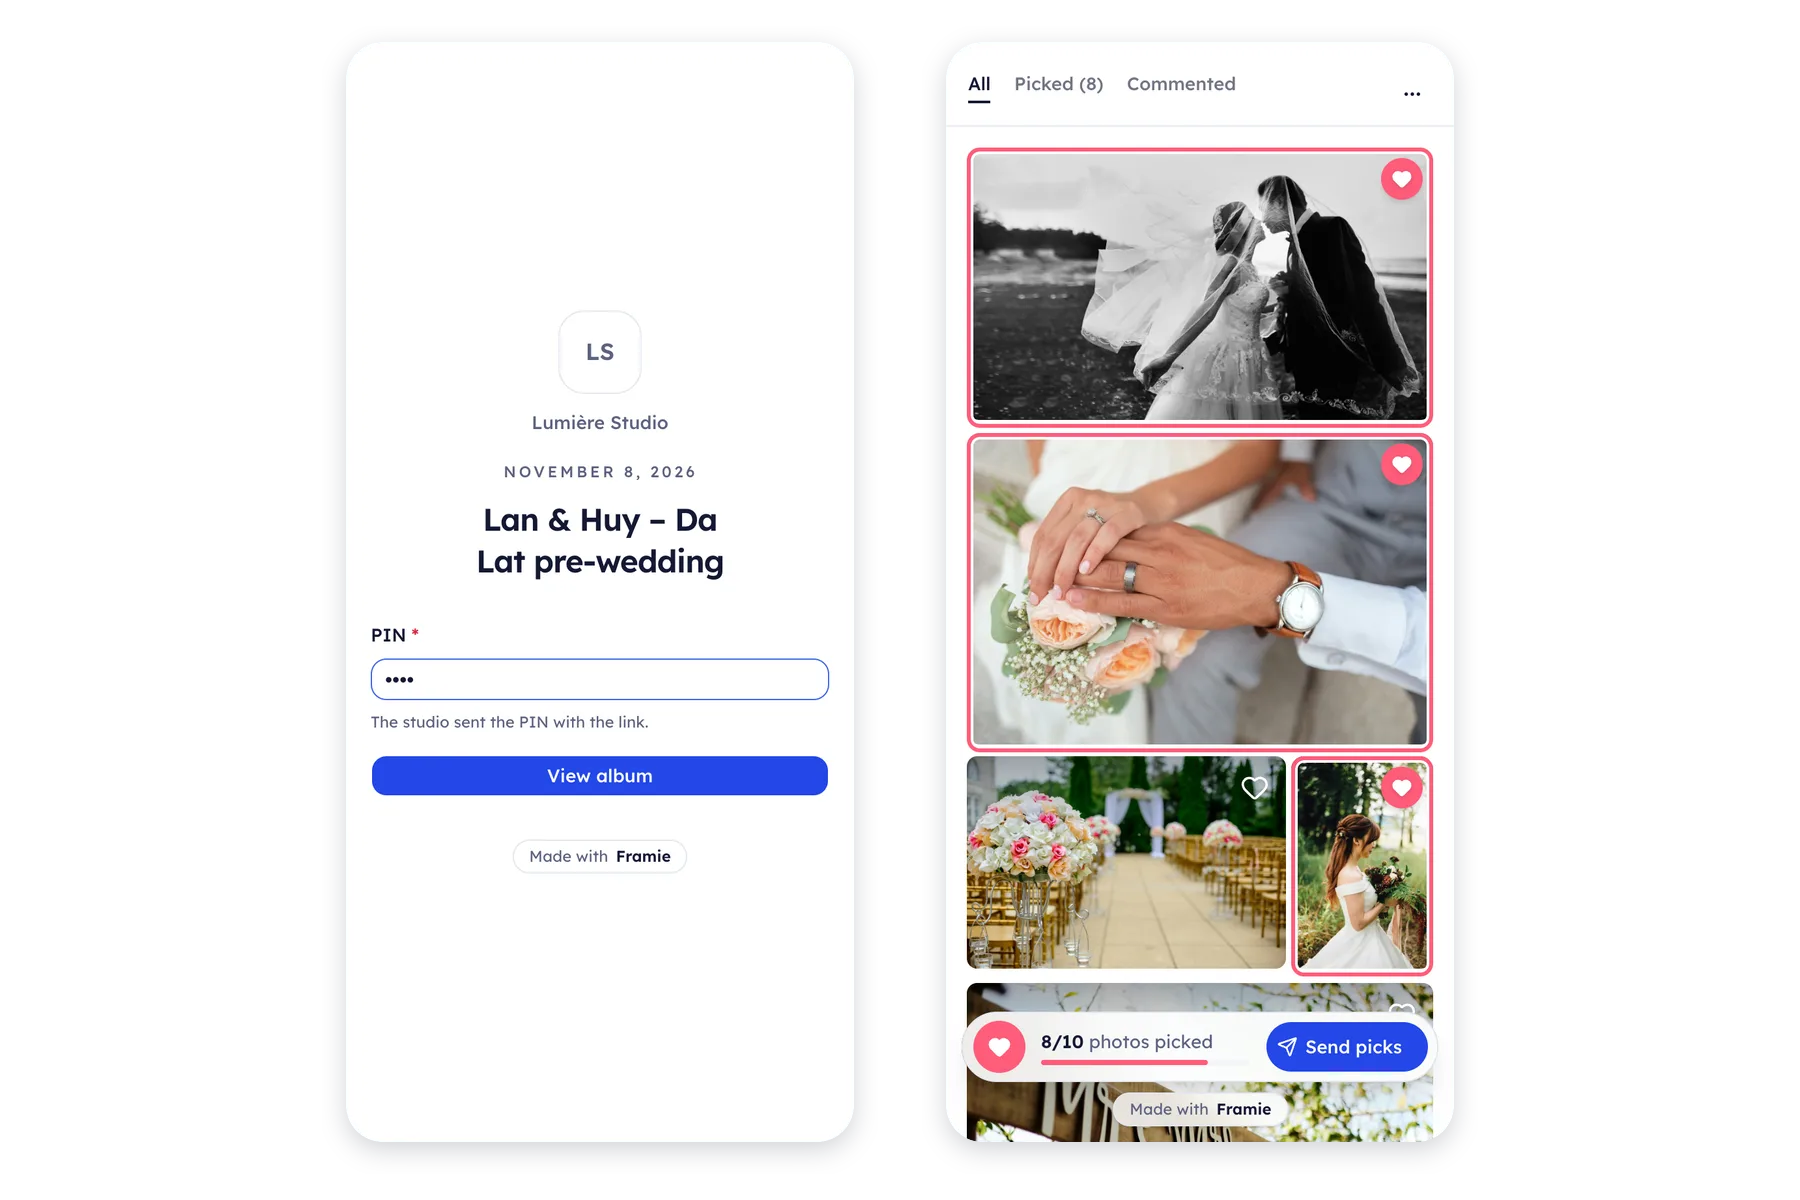
- PIN: 4 to 8 digits the client enters before seeing the photos. Leave it empty if you don't need one.
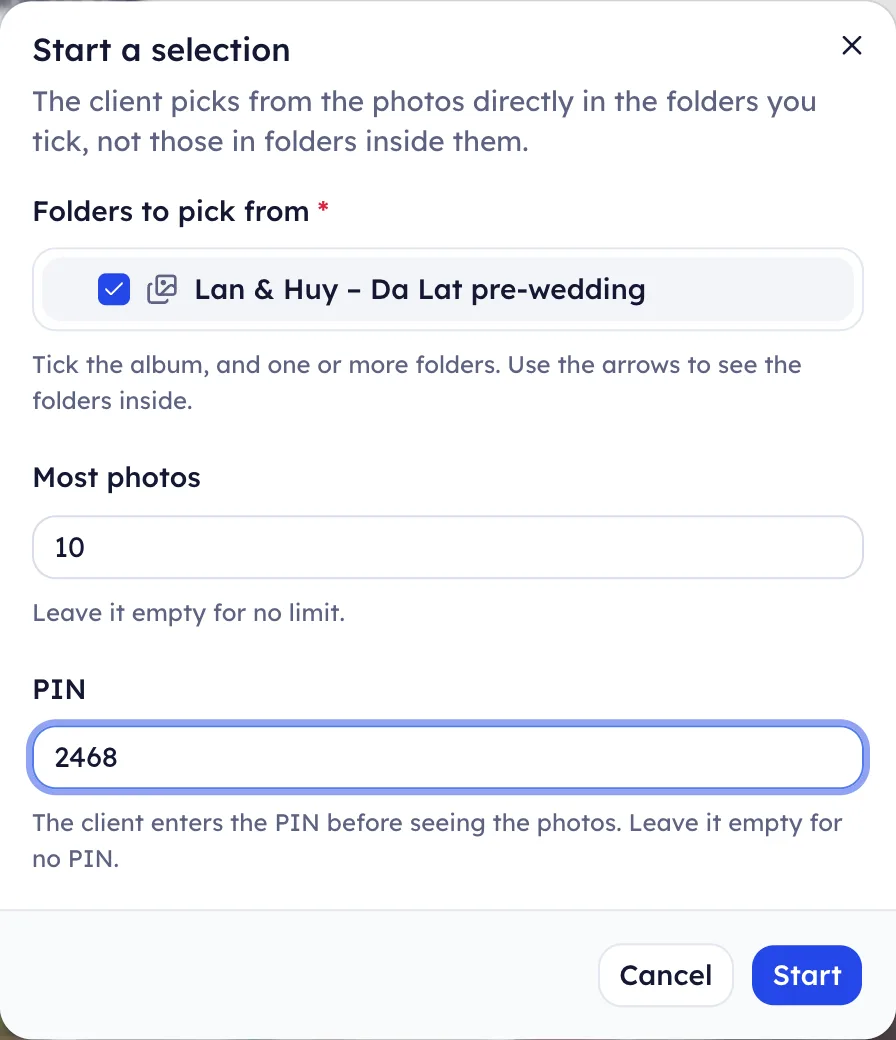
Click Start.
Step 4: Send the link to your client
The Photo selection card now shows the four steps of the workflow: client picks, studio edits, client reviews, finished. At the bottom, click Copy to get the link, then send it over WhatsApp, Messenger, or email, with the PIN if you set one.
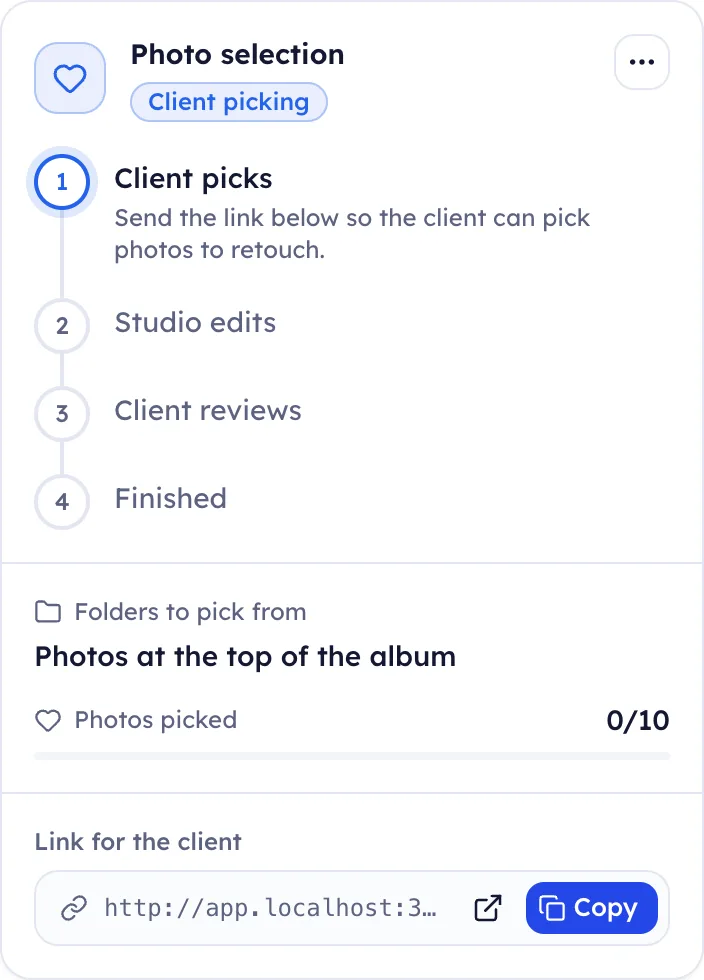
Your client doesn't need an account or an app.
Step 5: The client hearts the photos to retouch
Your client opens the link, enters the PIN, and sees the album under your studio's name. They tap the heart on each photo they want retouched. The bar at the bottom counts their picks against the limit, and the Picked tab gathers the hearted photos so they can look them over before sending.
Step 6: The client leaves notes and sends their picks
To tell you what to change, the client opens a photo, taps the exact spot, and writes a comment. The comment is pinned to that spot, so you know exactly where they want the edit.
When they're done, the client taps Send picks and chooses:
- Send: hands the picks to the studio for retouching.
- Accept as they are: finishes right away if the photos need no edits.
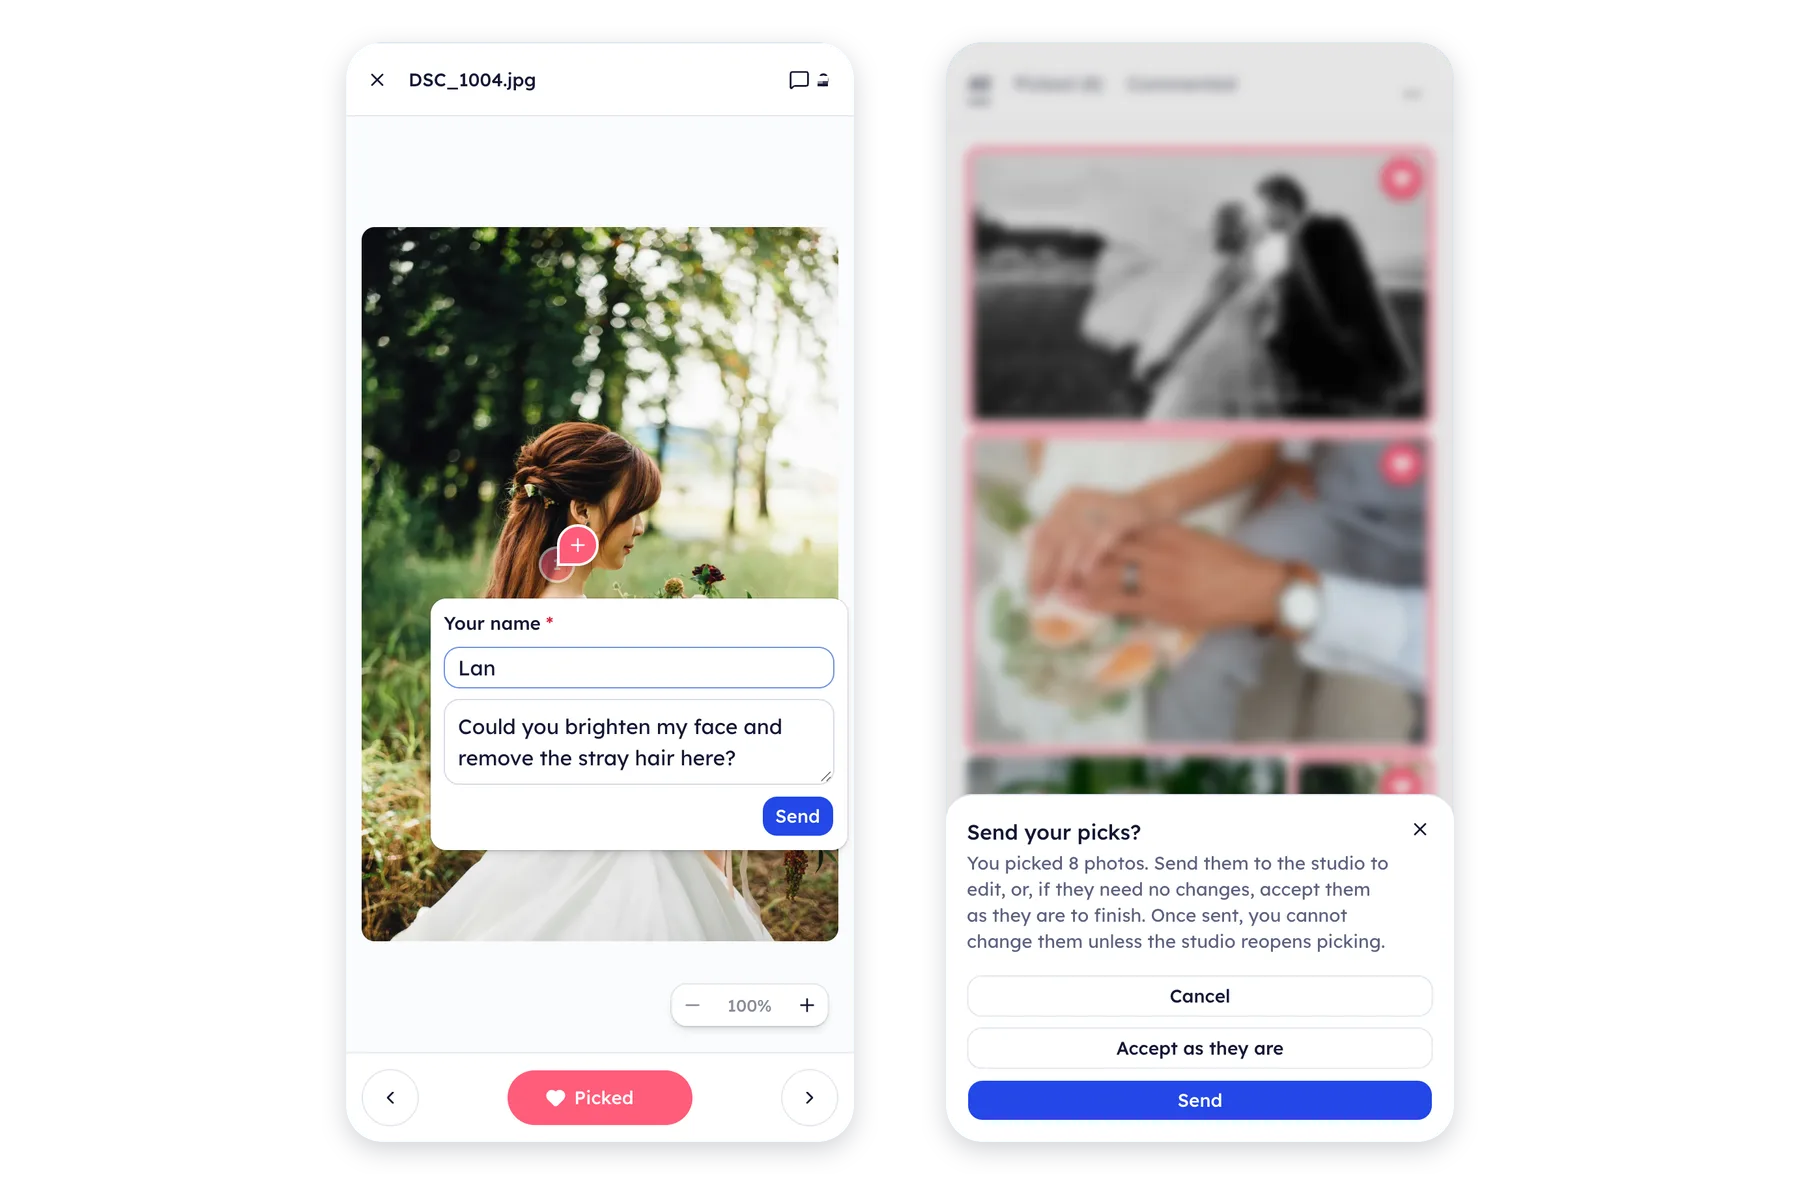
Once sent, the picks are locked unless you reopen them.
Step 7: Get the client's picks
Back in the album, the photos the client picked carry a heart, and the ones with notes show a comment count. The card on the right switches to Studio editing and shows how many were picked, here 8/10.
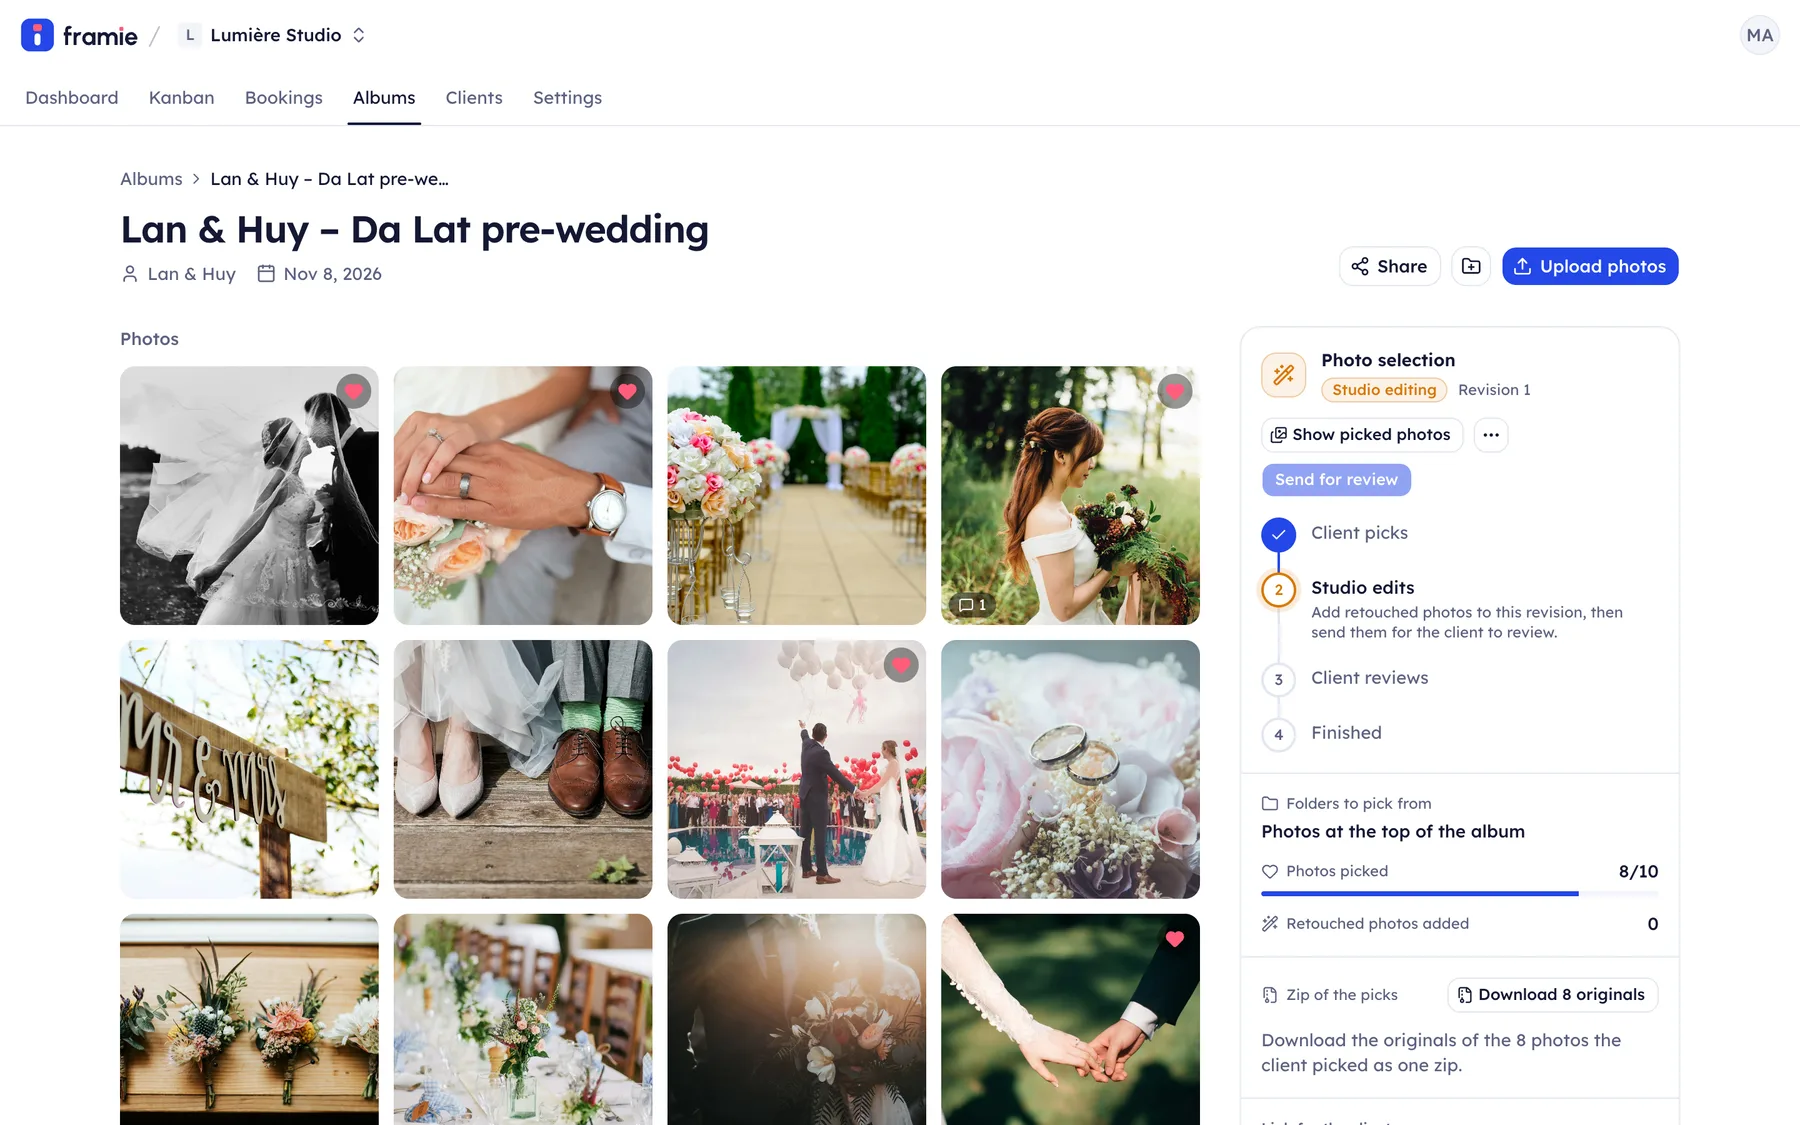
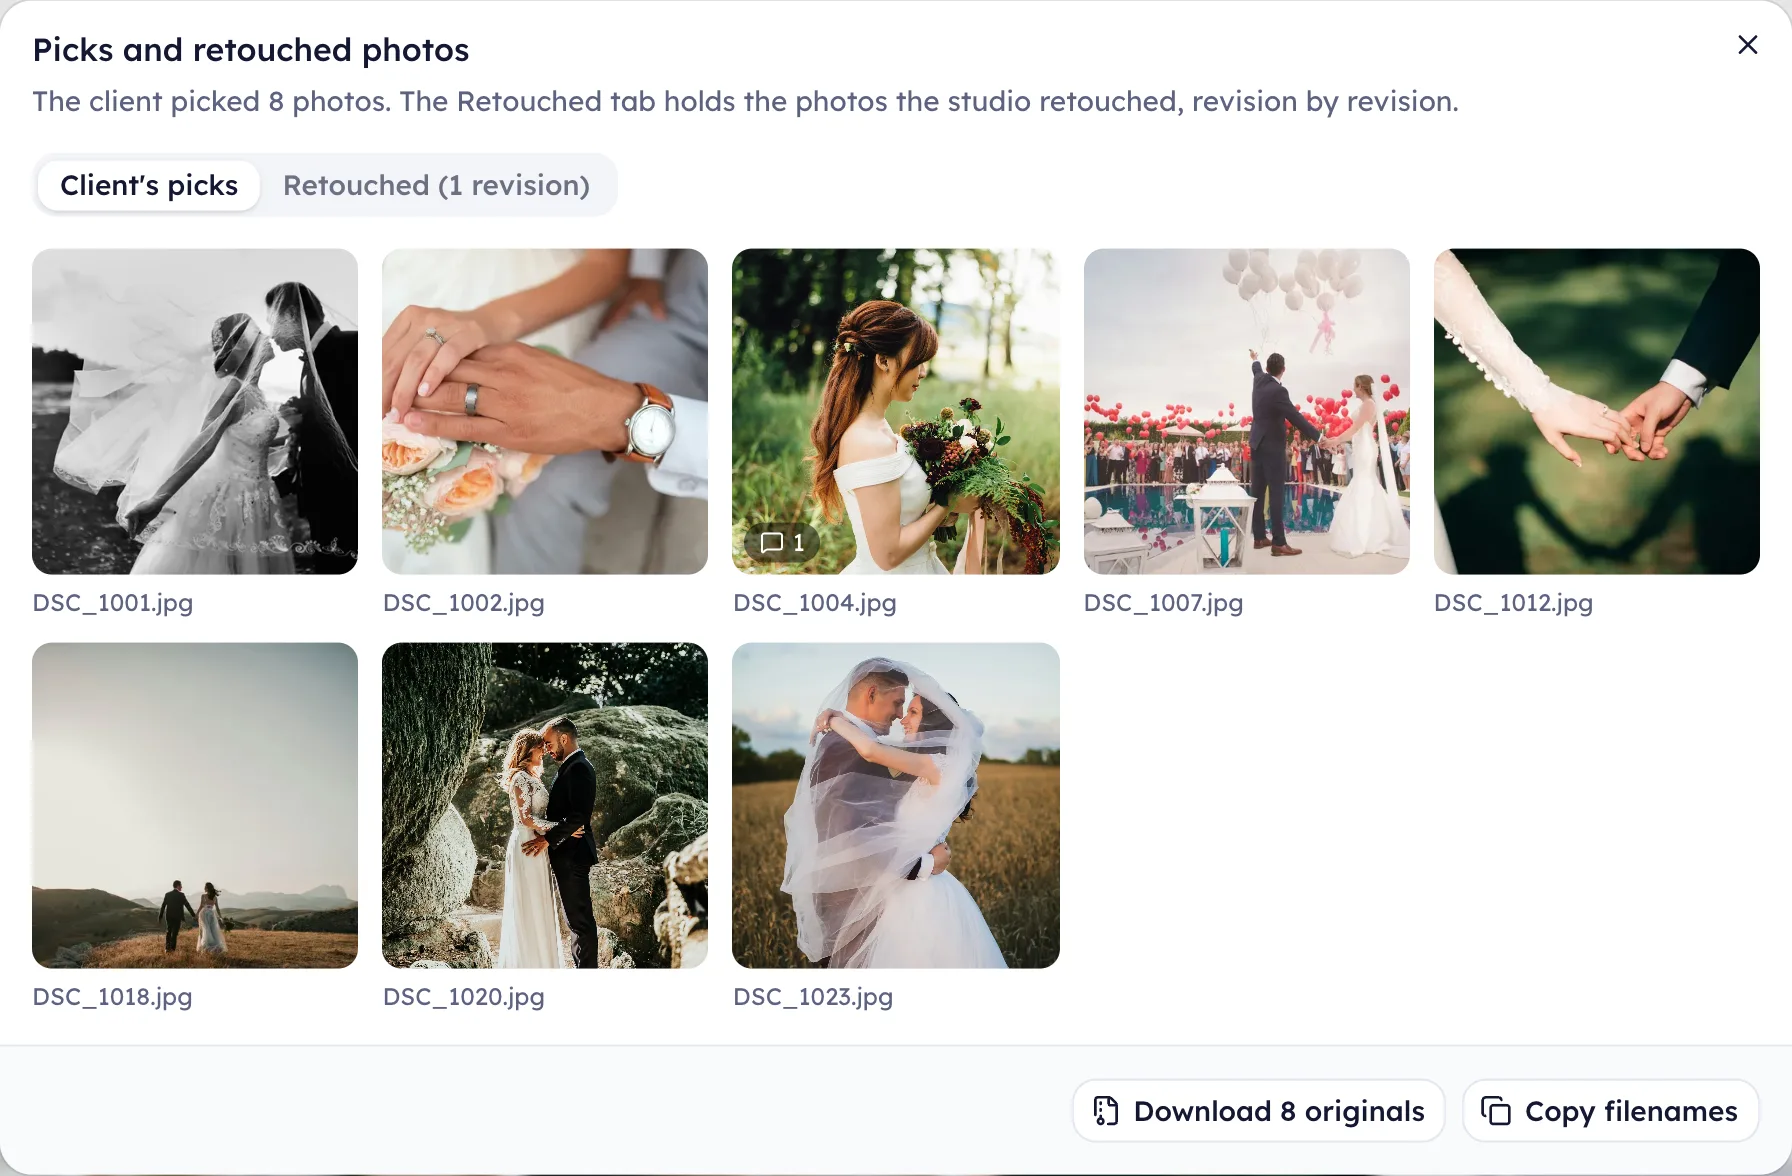
Click Show picked photos to see only the picks. From there you can:
- Download the originals: Framie zips the original of every pick so you can bring them into Lightroom or Photoshop.
- Copy filenames: paste the list into your editing app's filter.
Next: send the retouched photos for review
When you finish editing, upload the retouched photos to the Retouched tab of the same dialog, or import them from Google Drive, then click Send for review. Your client reviews them on the same link and accepts them or asks for changes, for as many revisions as you need. Once they accept, you can turn the album into a gallery to deliver the photos.
Framie is in beta and free to use. Try creating your first album for your latest shoot.
The sample photos in this post are from Unsplash.