Most bookings still start in a chat: a client asks for your prices, you send a price list, then you trade messages until you find a free day. In Framie, you put your packages and free times on a booking site of your own. The client picks a session and a time, sends a request, and you accept it in one click.
This guide covers the whole flow, from creating your first session type to the booking landing on your Kanban board.
The booking site is part of Bookings, on the Pro and Max plans.
Step 1: Add a session type
A session type is one of the packages you offer, such as "Pre-wedding" or "Family portrait".
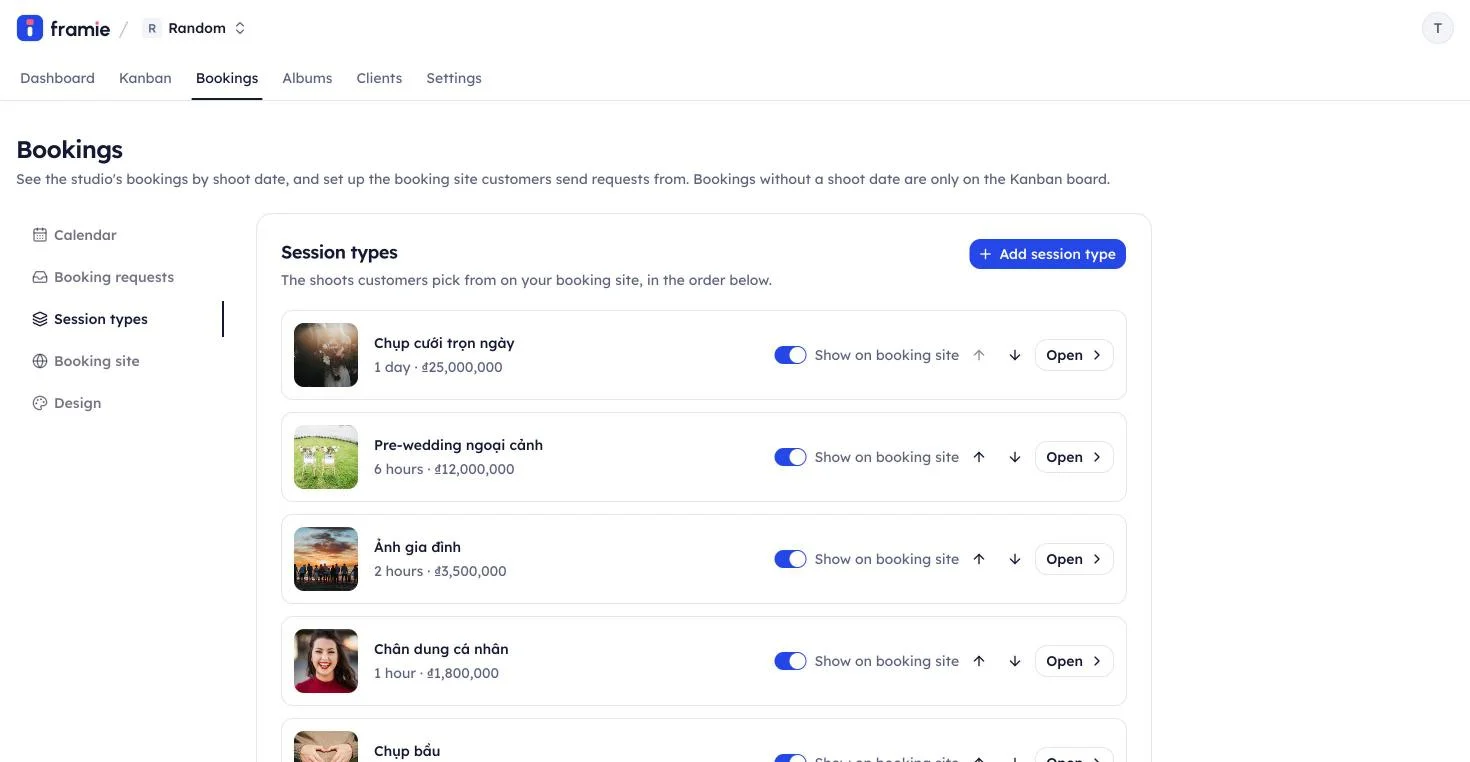
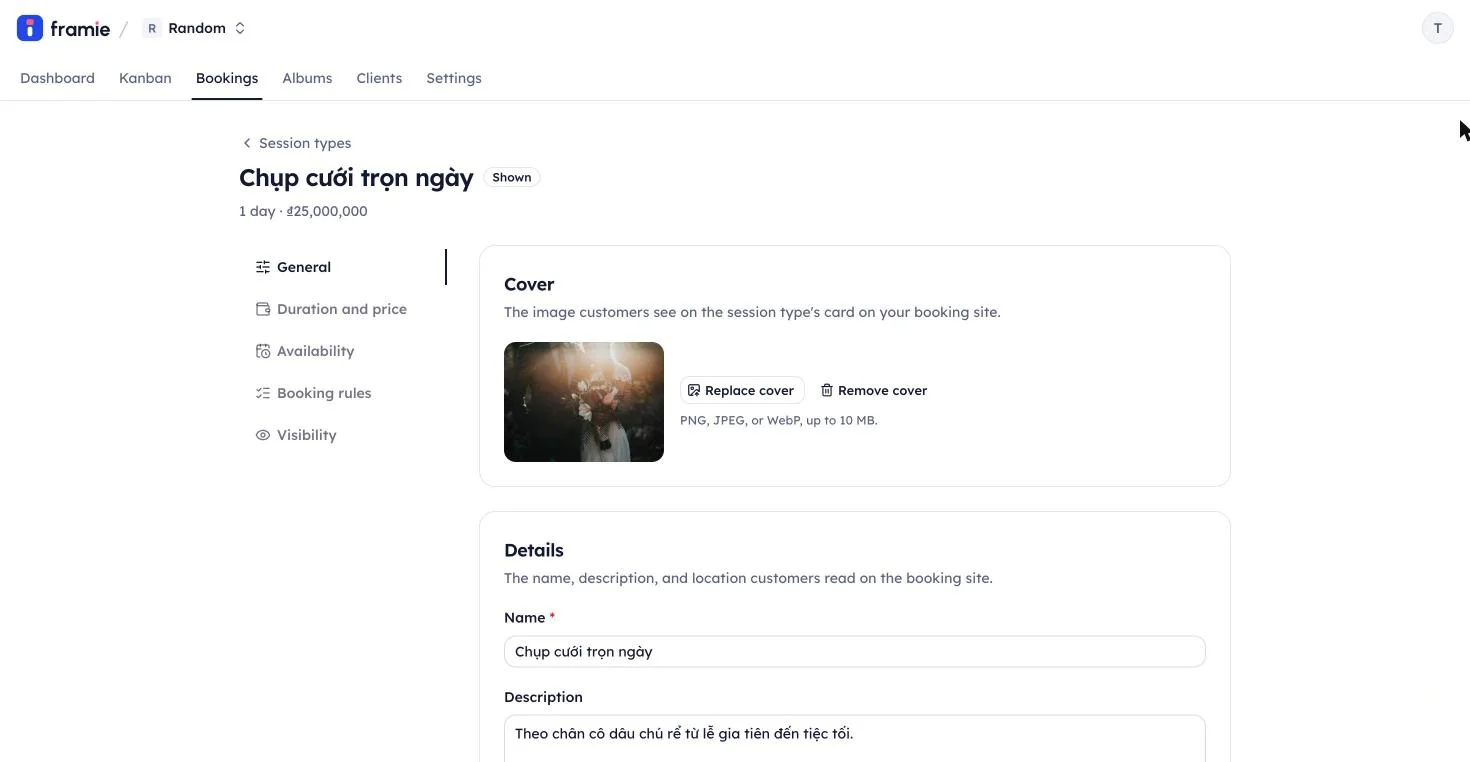
Open the Bookings tab, choose Session types in the side menu, and click Add session type. Enter a name and click Add. Framie opens the new session type's page, where you set it up section by section:
- General: a cover photo, the name, and a description of what the package includes.
- Duration and price: how long the session lasts, such as
90m,2h, or1d, and its price, in VND or USD. Leave the price empty if you'd rather quote it yourself. - Visibility: turn on Show on the booking site once the session type is ready. A new one stays hidden until you do.
Each card saves on its own. Repeat this for every package you offer, then use the arrows in the list to put them in the order clients should see them.
Step 2: Set the times clients can book
Without availability, clients send a request without a time and you agree on one together. To let them pick a time themselves, open the session type's Availability section and turn on Customers pick a time.
- Weekly hours: for each day of the week, click Add hours and set when you shoot, such as 8:00 to 11:00 and 14:00 to 17:00. Leave a day empty to close it.
- Booking rules: under Add date, change the hours of a single day, or close it for a holiday. You can also set how much notice you need and how far ahead clients can book.
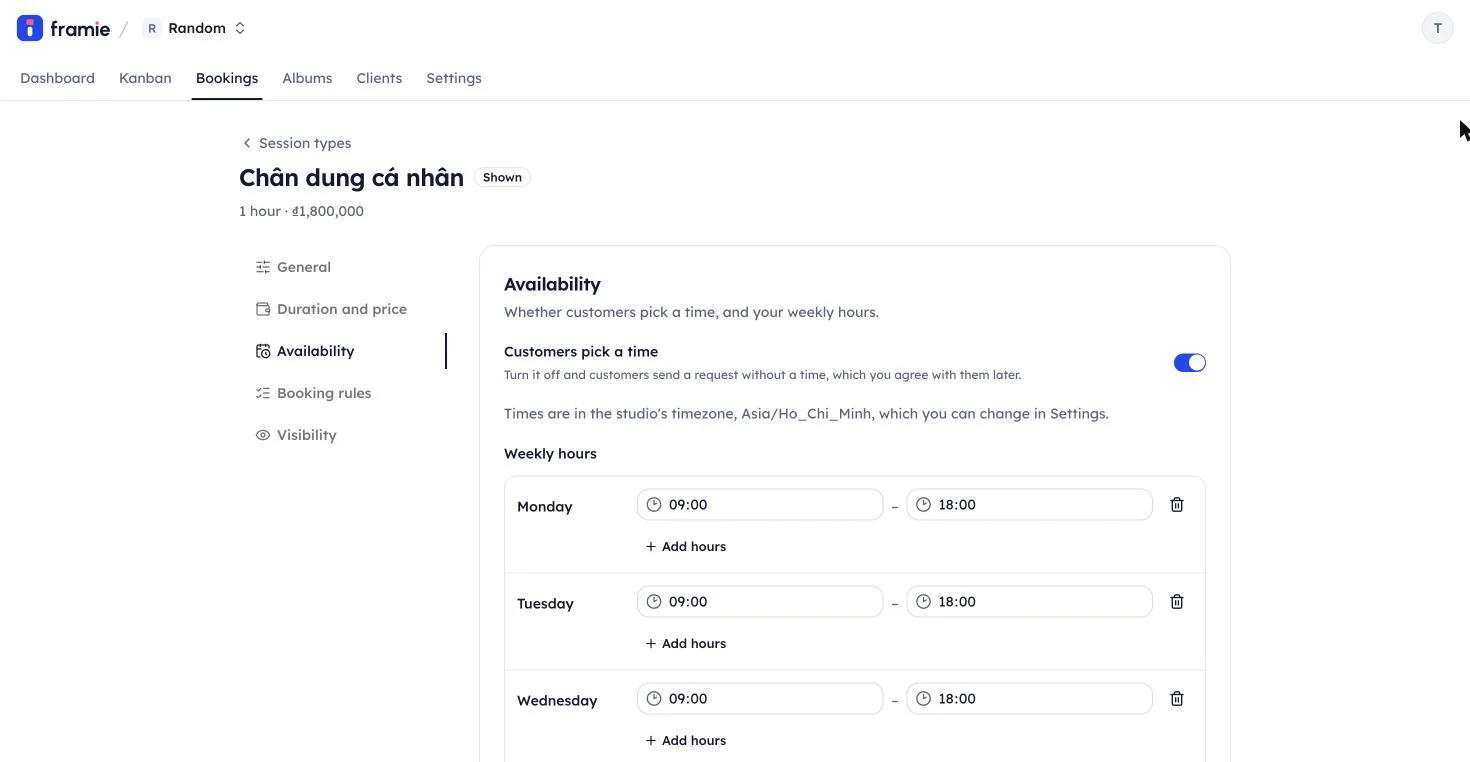
Times follow your studio's timezone, which you can change in Settings.
Framie only offers times that are really free. A time taken by another booking or by a pending request disappears from the site, so two clients can never book the same slot.
Step 3: Publish your booking site
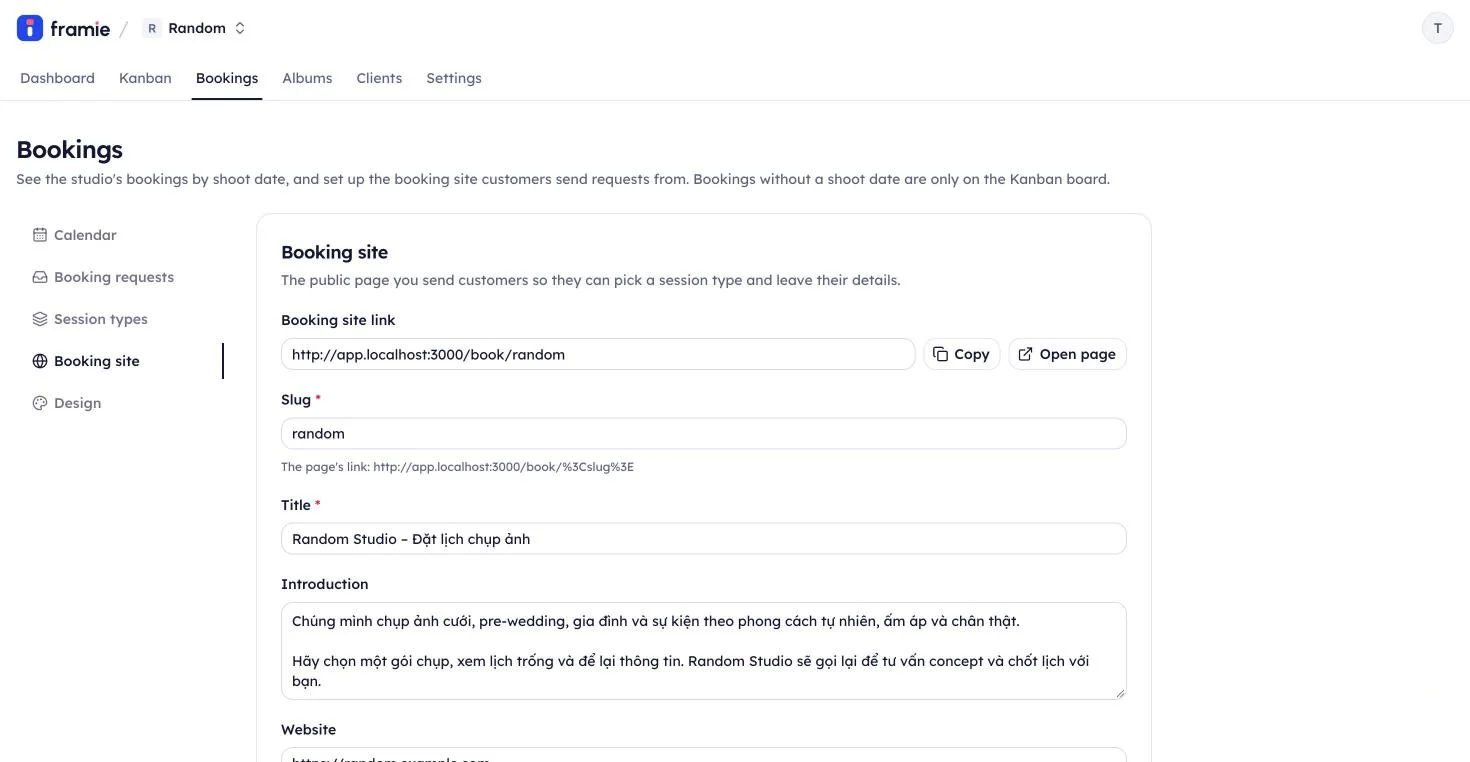
Choose Booking site in the side menu. Framie suggests a link from your studio's name, such as /book/framie-studio. Set:
- The slug in the link, and the Title clients see at the top, such as "Book a shoot".
- An introduction about your studio, your website, and your Facebook, Instagram, TikTok, YouTube, or Zalo.
- Open the booking site: turn it on to put the page online.
Save, then click Copy to get the link, or Open page to see it as clients do.
Step 4: Make it look like your studio
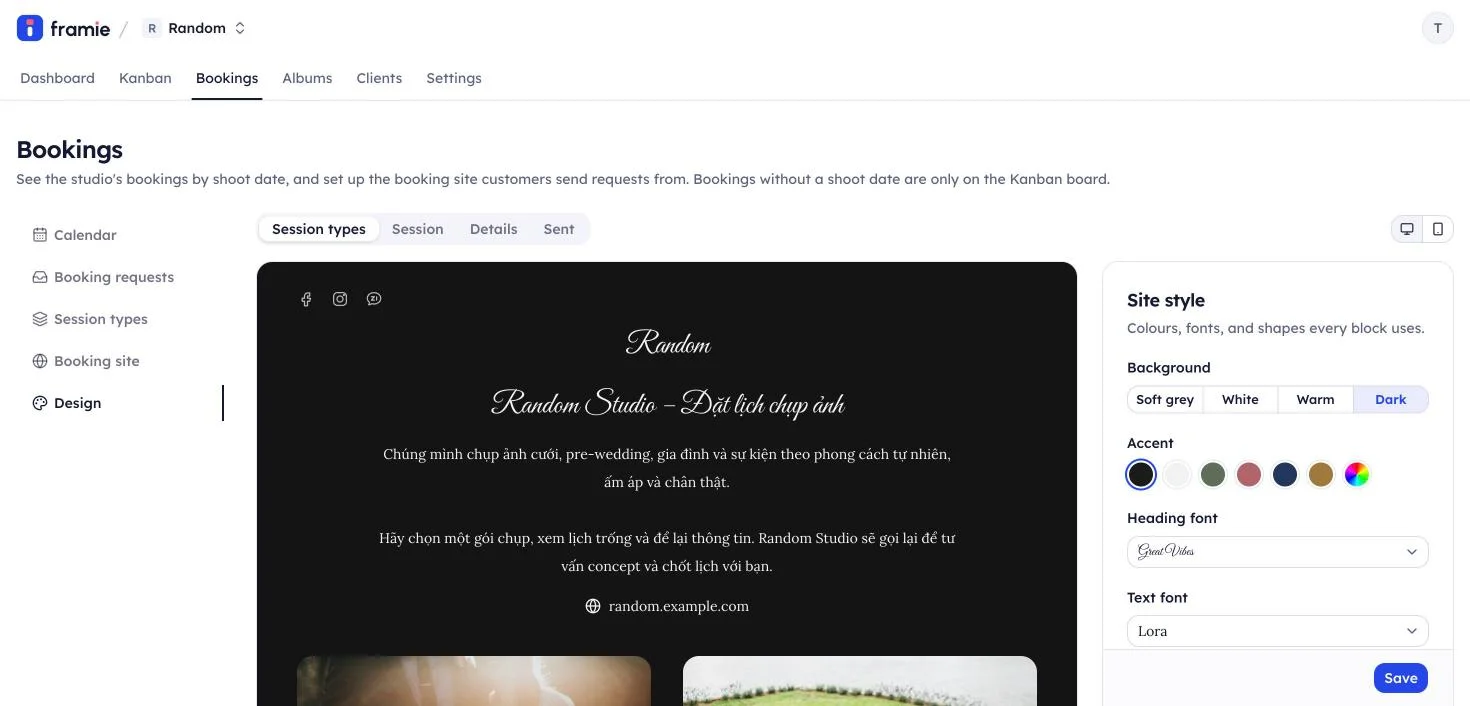
Choose Design in the side menu. You see a preview of each screen of the site, on a computer's or a phone's width. Click any part of it, such as the header, the session types, or the time picker, to change its colours, fonts, corners, and buttons on the right. Click Save when it looks right.
Step 5: Share the link
Put the link in your Instagram bio, your Facebook page, your Zalo messages, or your website. Clients don't need an account or an app to book.
How clients book a session
From the link, your client:
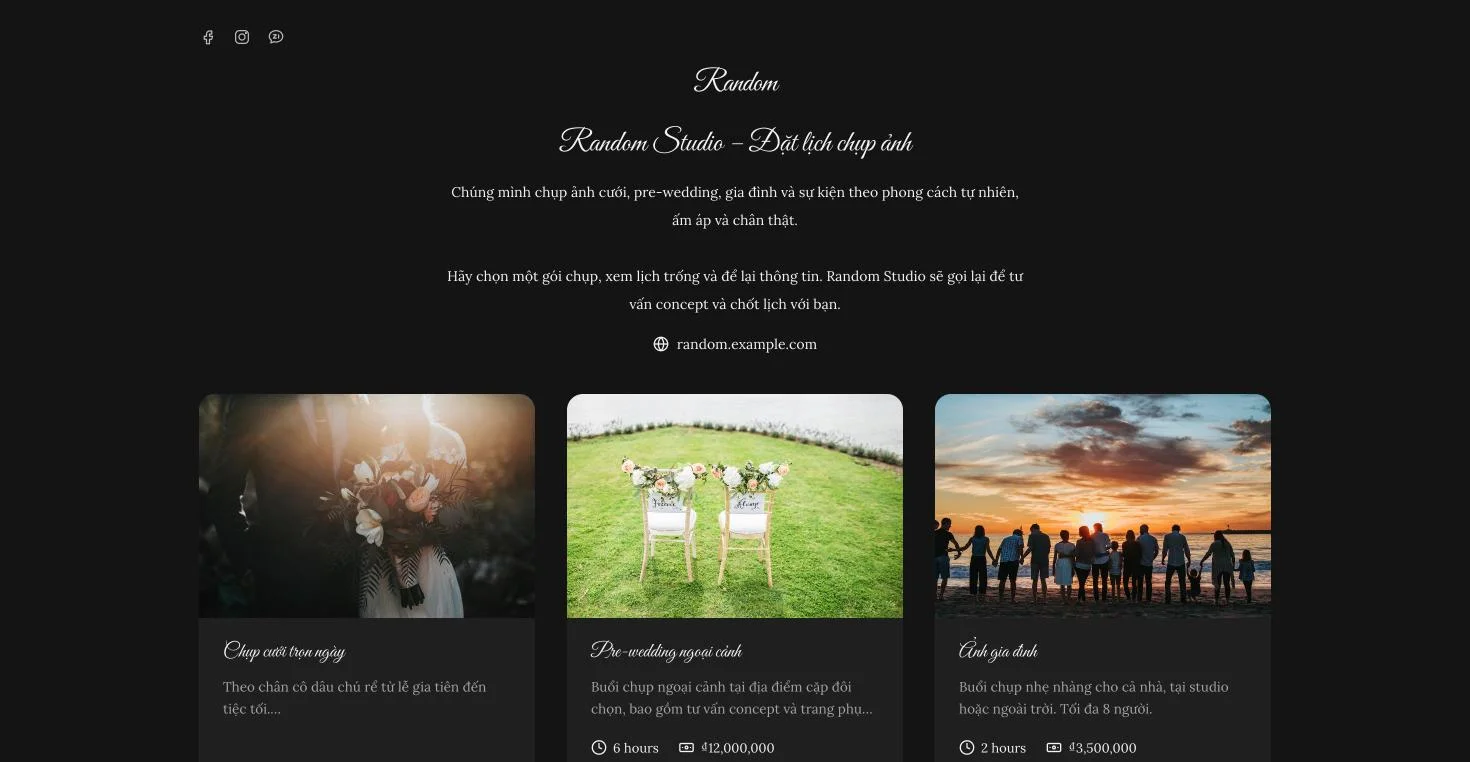
- Picks a session type from the cards on your site, with each one's cover, duration, and price.
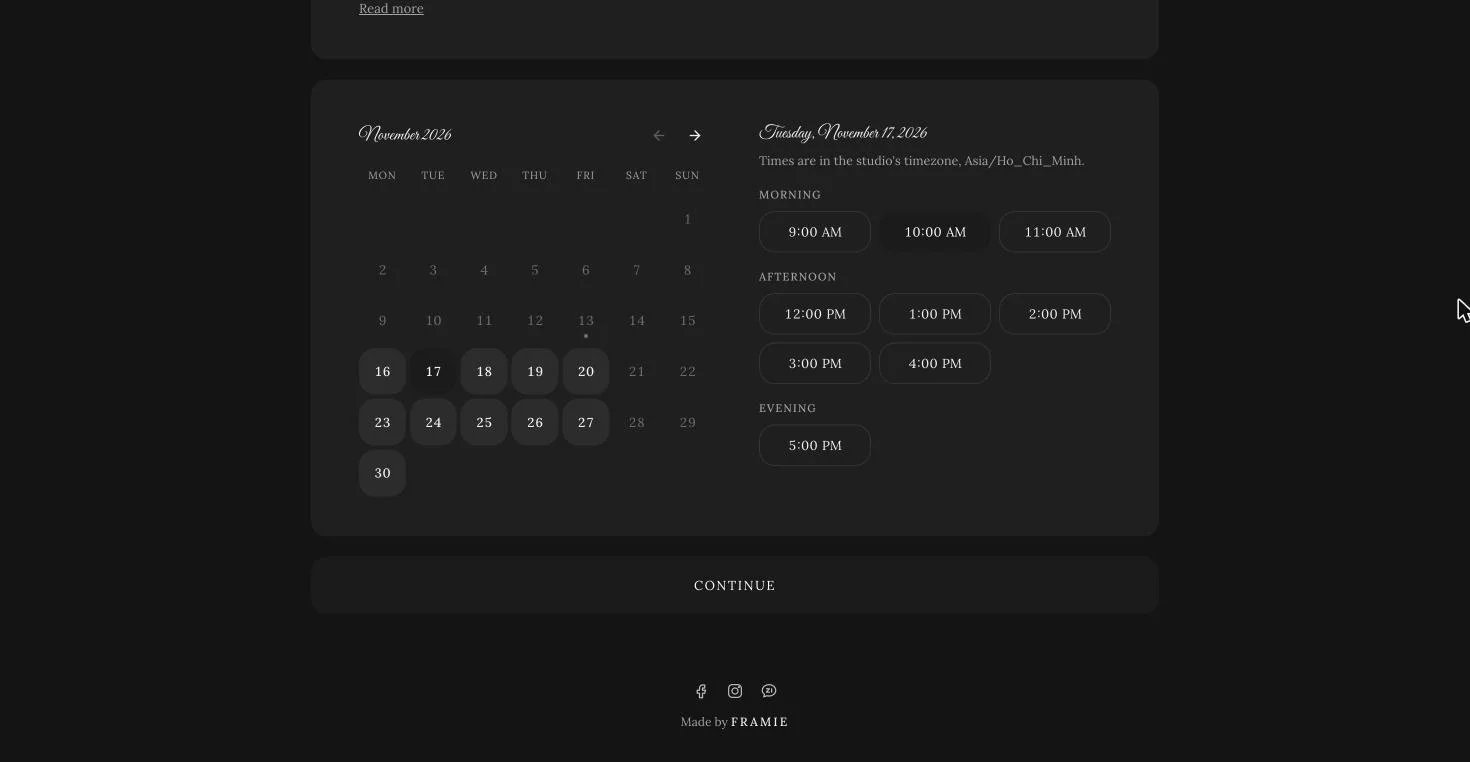
- Picks a time: under Pick a time, a calendar shows the days with free times, and they choose one, then click Continue.
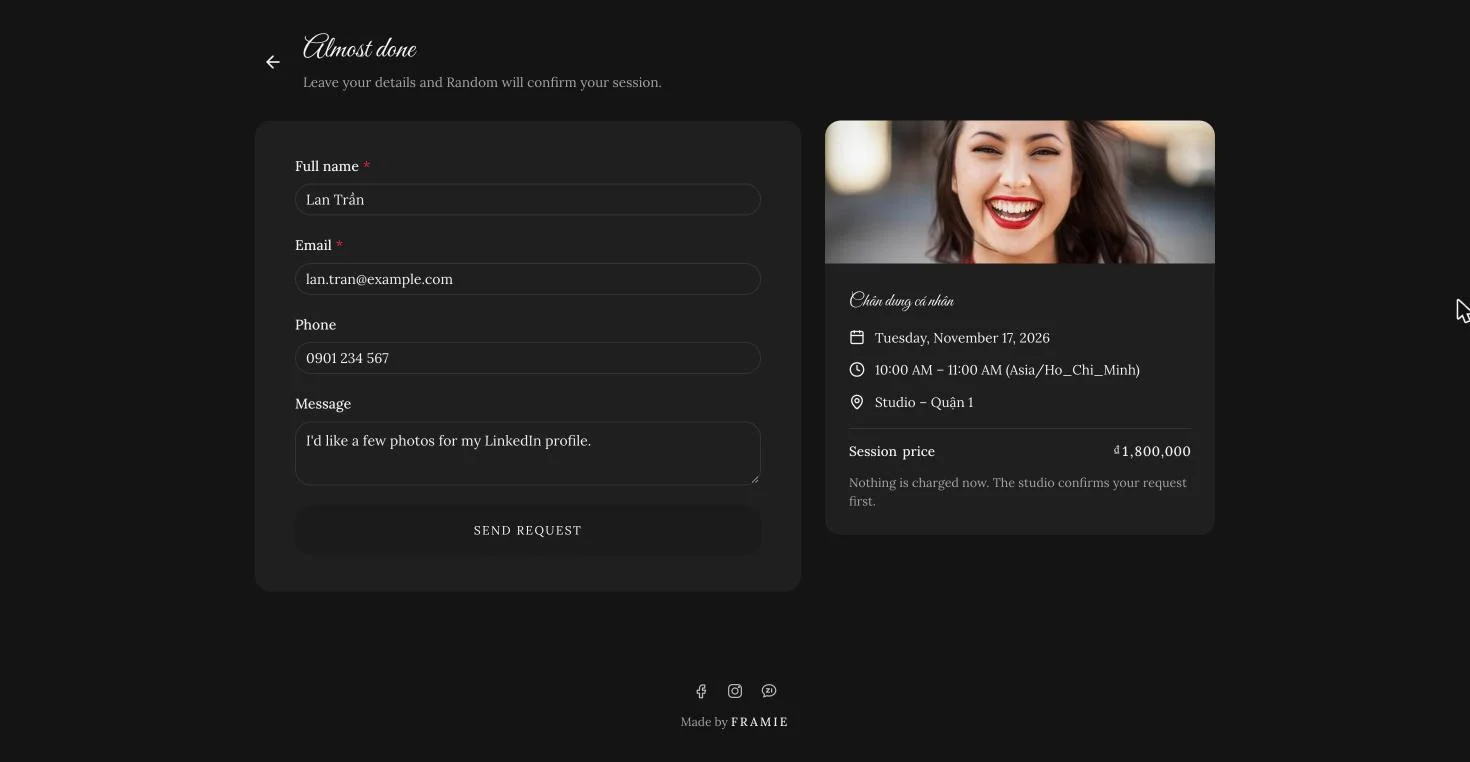
- Leaves their details: their name, email, phone, and a message, beside a summary of what they're booking, then clicks Send request.
- Sees a confirmation with buttons to add the time to Google Calendar or download it for any other calendar.
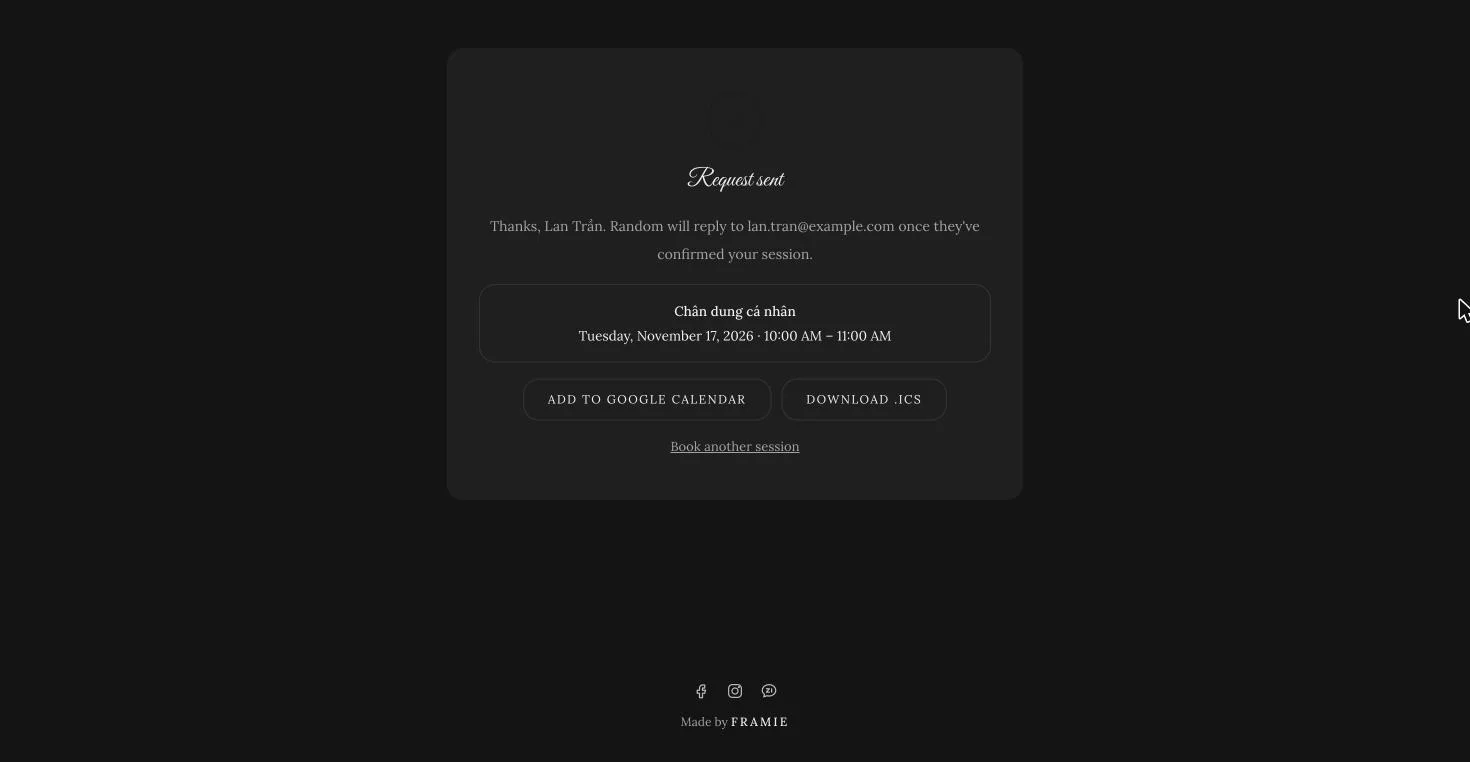
If someone else takes the time while they're filling in the form, Framie takes them back to the picker to choose another.
Step 6: Accept the request
The request appears under Booking requests in the Bookings tab, with the session type, the time picked, and the client's details. Click:
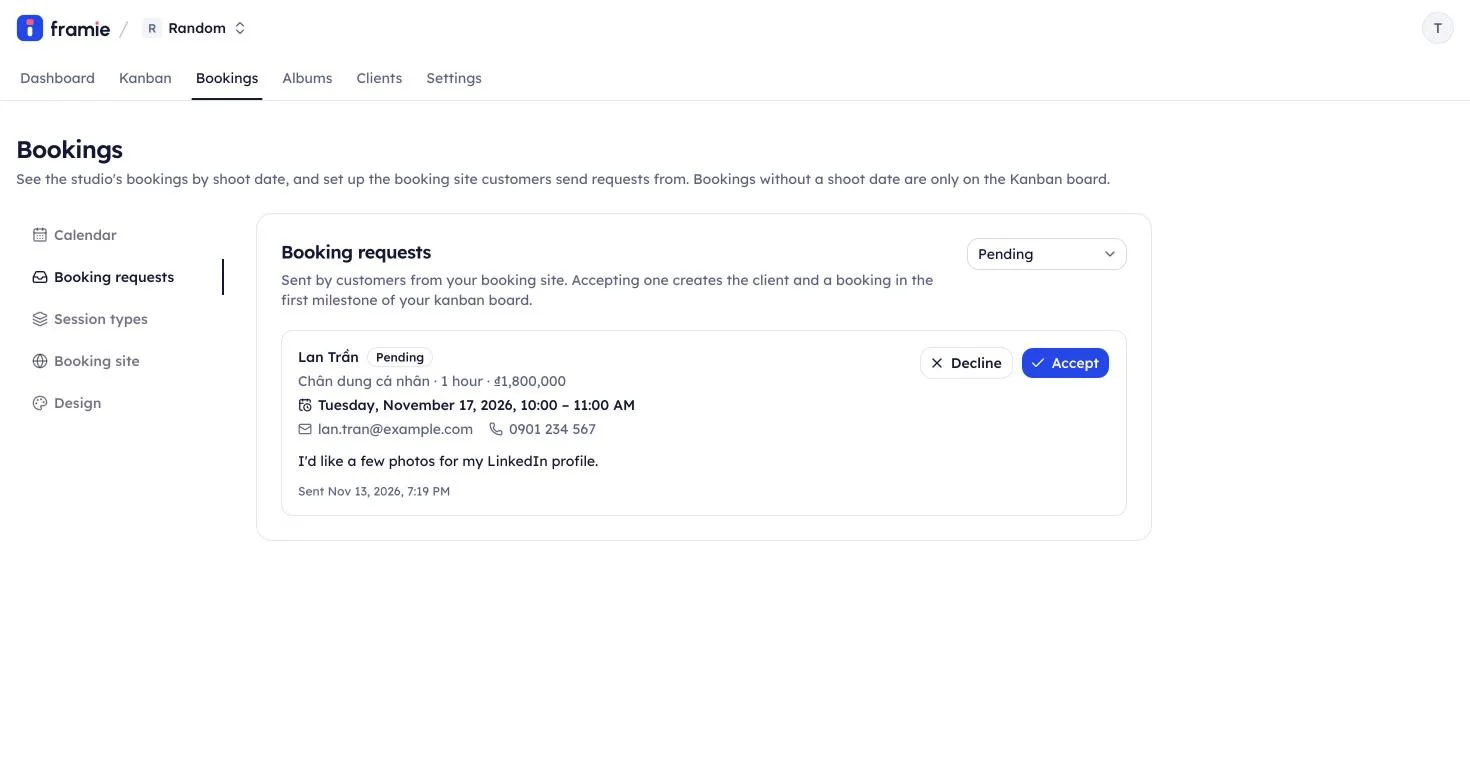
- Accept: Framie finds the client by their email, or creates them, and adds a booking at the time they picked, in the first milestone of your Kanban board. Assign it to your team, and it shows on your calendar.
- Decline: the request is marked declined, and the time is free again.
That's it: the client picks, you click once, and the shoot is on your board.